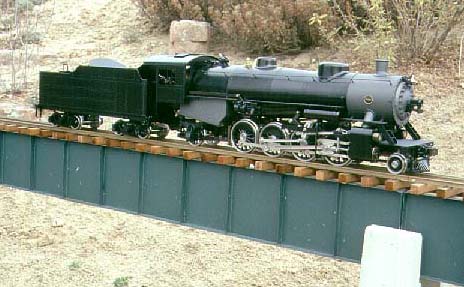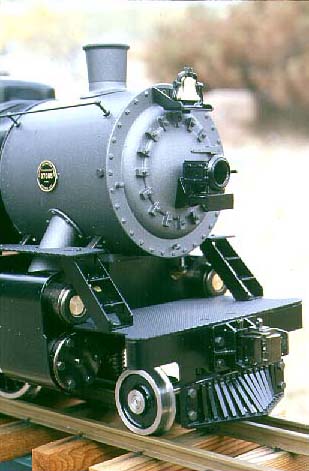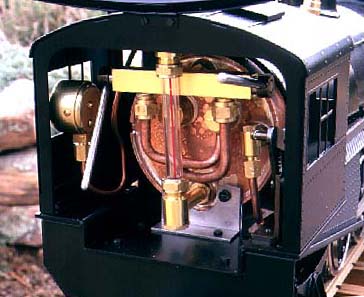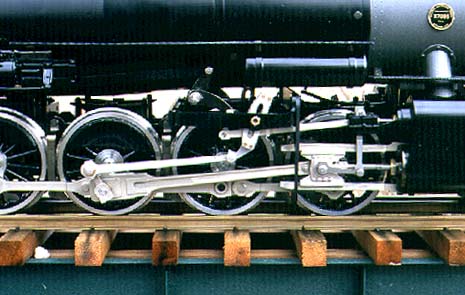


PRODUCT DESCRIPTION: All metal, pre painted, screwdriver-assembly kit for a USRA light Mikado; internally fired boiler; working Walschaerts valve gear; alcohol burning. Minimum radius, 6'. Boiler fittings include throttle, blower valve, pressure gauge, water glass, two safety valves. Length over all, 29-7/8"; width, 3-13/16"; height, 5-3/4".
PROS: Attractive, robust, basic model; good fidelity to prototype; well designed and produced; excellent finish; excellent, well thought-out instructions and assembly order; powerful model intended for work in the garden; easy access to controls; accurate scale/gauge combination.
CONS: No water pump provided (axle and tender pumps offered as options); some minor errors in instructions; low level of detail.
 The
first United States Railroad Administration (USRA) light Mikado was
delivered in 1918. A total of 1,266 of these (and copies) were
ultimately
used on over 50 railroads. These locomotives were used primarily as
freight
haulers put were sometimes pressed into passenger service as well.
Because
of their relatively small drivers, they were powerful but not speedy
engines.
The long-awaited model of this engine from Aster is finally available. This kit is a bit retro for Aster, in that it is lower in detail than many of the company's more recent offerings. What we have is a stripped-down model of a classic American locomotive. The proportions are right and the dimensions are right, but a lot of extraneous detail, like piping and smaller boiler fittings, has been left off.
The kit comes packaged in a cardboard box. Upon opening it one finds a series of neatly laid out blue boxes, each containing the parts for one or more subassemblies. Each box has the number of its subassemblies clearly printed on the outside. As with all Aster kits, instructions are provided in two parts -- a written set and a book of drawings. These are to be used in conjunction with one another. Each subassembly in each box comes in its own plastic bag, complete with parts list for that subassembly. All of the more generic fasteners are packaged separately, each with its own label. These are supplied in abundance -- you should have lots of spares left over. Some tools are provided, but you'll also need some small files, pliers, tweezers, small wrenches, and so forth.
Construction begins with the engine's chassis. Assembly is straightforward. There were some minor problems, but nothing major or insurmountable. The instructions tell you how to lap the valves and port faces, set the valves, and conduct an air test. Once the chassis is successfully running on air, you proceed to the boiler.
 The
actual boiler is made of copper, all silver soldered. Once the fittings
have been installed and the firebox screwed to the bottom, the outer
shell
is addressed. All details -- running boards, air tanks, handrail
stanchions,
compressor, dummy reverser -- are screwed to the outer shell. When
these
are in place, the boiler is placed inside and firmly attached. The
smokebox
is added and the boiler assembly is joined to the chassis. It is at
this
point that the thing begins to look like a locomotive. Other details,
the
leading and trailing truck, the burner, and the cab are now added.
Tender construction is simplicity in itself. Since no pump is provided, it is a matter of assembling the trucks and screwing a few components together in the prefabricated tank. The Andrews style trucks have dummy leaf springs, but are actually sprung with hidden coil springs.
The instructions wrap up with a section on safety, locomotive maintenance, and a comprehensive set of driving instructions that should enable the first-timer to run the engine unassisted.
The finished locomotive is handsome and impressive. It is all black, with a graphite smokebox and firebox. Since it is an engine that was used by many different railroads, it is supplied unlettered (decals for several road names are available from Robert Dustin). It is up to you to provide whatever details are necessary to identify the engine with your favorite road.
The springing on the finished locomotive is not quite right. The center of gravity is toward the rear of the engine, and the engine tends to sit down by the stern a little. The dummy ashpan fouls the dummy spring hanger on the rear truck. This is not a great problem on wide-radius curves, but it could be on sharper curves and when backing. The dummy spring hangers can be filed to clear the ashpan, but a better solution would be to provide stiffer springs on the third or fourth axle.
The steam test was done on a cool day -- about 50°F. It took six minutes using an auxiliary fan to bring the boiler pressure up enough to turn on the engine's blower. After that, an additional three minutes was required to bring the engine up to working pressure (about 30 psi). Since the cylinders were cold, the engine had to be pushed to clear and warm them. Once that was done, the engine moved off under its own power.

Operation was smooth, with an audible and gratifying exhaust beat. I tried the locomotive at all different speed settings and in both directions. Performance was excellent. I got the advertised 15-minute run (after building up steam), at which point the water was right down at the bottom of the glass. I would expect this figure to improve some as the engine is broken in.
The biggest drawback to the kit is the fact that no pump is provided (although there is a check valve and a fitting for a pump). Without a pump, the locomotive must be entirely shut down after each run so that water can be added through a safety-valve hole. With a pump, it could be kept in steam indefinitely.
There are three options for pumps. The most basic is a trackside pump. This can be hooked up to the provided fitting when the engine stops to take on water. The second is a tender pump. This functions like a trackside pump, in that the engine must be stopped for the boiler to be filled. The third option is an axle pump (and its attendant bypass system), which is intended to keep the boiler filled at a specified level while the engine is in motion.
All in all, this is a fine kit. I never cease to be amazed at how well the multitude of parts fit together and the holes line up. As Aster kits go, this one is relatively simple. However, that doesn't mean it is a simple kit. Be prepared to spend 20-30 hours on it. I wouldn't recommend this kit to beginners, but if you have some mechanical experience and understanding and are ready for a high-end live steamer, I think it is an excellent introduction to Aster products. What you have when you are finished is a strong, robust, accurate model of a classic American locomotive.
Last updated: 13 December, 1999.